Use:
As an Authorization Grantor, you can use this page to add a Batch Authorization to ADAM. Adding a batch authorization is similar to adding a single authorization, except, it allows for multiple authorizations to be added simultaneously.
An authorization allows you to authorize an End User (including yourself) to access and perform specific tasks/functions in a specified application. An authorization may also be for a specified organization.
An Authorization specifies a:
User;
Profile; and,
Organization (if applicable).
Note: A profile includes the application.
Note: When adding a Batch Authorization do not mix profiles which are secured by organization with those that are not secured by organization. See the Batch Authorization Profile tip.
Results:
A new Batch Authorization is created in ADAM.
Access the page:
To access this page:
Select New Authorization from the left navigation bar.
Click the Batch tab.
If the New Authorization link is NOT visible in your left navigation bar then you are not authorized to add authorizations in ADAM. You must have the Authorization Grantor authority in ADAM to add authorizations.
How to:
The steps below outline how to use this page if you wish to enter the Batch Authorization. Alternatively, you may upload a file containing the Batch Authorization data using the Bulk Load Authorizations section of this page.
To bulk load authorizations, use the Browse button to locate the file and then click the Submit button. The file must match the specifications.

Click the New Authorization link.

Click the Batch tab.


Enter the User ID(s) of the user(s) you wish to add an authorization(s) for in the Authorize User(s) field. You must click the Magnifying Glass icon and locate users using the User Search. Then you may add each user. Visit the User Search - Batch help page for additional assistance.
Once you return to the Create a New Authorization (Batch Mode) page, you will notice that each user is highlighted in blue. If you wish to:
De-select a user (the row is highlighted blue), click on the row of data containing that user. The row will no longer be highlighted.
Select a user (the row is not highlighted), click on the row of data containing that user. The row will become highlighted.
You can select multiple users by holding the "Ctrl" key on your keyboard while clicking each row.
Note: If you are having trouble finding a Business BCeID User, read this tip: Business BCeID Special Action.

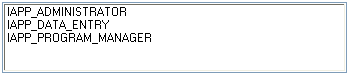
Select the profile(s) for this authorization using the Access to Profile(s) field.
(You can select and de-select each/multiple rows using the same method explained in Step #3.)

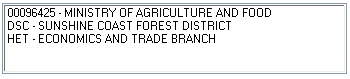
Specify the organization(s) for this authorization (if applicable) using the For Organization(s) field. You must click the Magnifying Glass icon and locate organizations using the Organization Search. Then you may add each organization. Visit the Organization Search - Batch help page for additional assistance.
Be sure you select an organization(s) which is currently effective. See the Organization Information page if you are uncertain.
If you are able to access this field, but the organization you require is not listed, be sure you have accepted all required Delegation Agreements.
If you have selected a profile (in Step #4) which is not secured by organization, you must leave this field blank. You can learn more about the requirement to select an organization by visiting the Understanding the Profile and Organization Link help page.
(You can select and de-select each/multiple rows using the same method explained in Step #3.)

Enter the date you wish the authorization(s) to come into effect using the Effective field.
If you would like the authorization(s) to come into effect immediately, check the Immediately Checkbox and do not enter an Effective Date.

Enter the date you wish the authorization(s) to end using the Expires field.
If you would like the authorization(s) to remain active indefinitely, check the Never Expires Checkbox and do not enter an Expiry Date.

Click the Enabled Checkbox to activate the authorization(s).

Enter any applicable notes in the Comment field.

Click the Add Authorizations button.
You will receive an Authorization Process Confirmation page with the details of this authorization(s) for you to confirm.
![]()
Group Authorizations
If you have been delegated the ability to create Group Authorizations, you will notice that this page contains a Authorize Group(s): (Select Multiple) field.
You may use this field to select one or multiple groups. (You can select and de-select each/multiple rows using the same method explained in Step #3.)
Once the batch authorization has been completed successfully, all members of the selected group will have this authorization.
If you have not been delegated the ability to create Group Authorizations, but require this ability, then you will need to request the Authorization Grantor - Group (ADAM_GROUPGRANTOR) profile. Visit the What are ADAM Profiles? page of this guide to learn more about ADAM Profiles.
In the example screen below, click on the underlined name of a field or a button. A pop-up window appears with explanations and information on terms.